Many stakeholders are skeptical about the impact of social media. Correlating actions on your website to your social media activity can be the quickest way to prove you are headed in the right direction.
A Facebook Pixel is a piece of code for your website that lets you measure, optimize and build audiences for your ad campaigns.
![]()
Why Use Facebook Pixel:
-
Conversion Tracking: Installing Facebook Pixel on your website will allow you to see how people interact with your website after viewing or clicking on your ad. Most importantly, you can view if and when someone takes an action such as making a purchase, filling out a contact form, or engaging with content.
-
Optimize Ad Campaigns: With Facebook Pixel installed you will be able to optimize your ad campaigns to focus on users that seem most likely to take a specific action on your website. You can optimize for conversions, clicks, or engagement.
-
Cross-Device Tracking: Many people see an ad on their mobile device, but don’t convert until later when they are on a different device. With Facebook Pixel installed you will be able to gain insight into users that switch between multiple devices.
-
Create Custom Audiences From Website Visitors: With Facebook Pixel installed on your website you can show dynamic ads to users on Facebook and Instagram based on what they viewed or interacted with on your website.
-
Learn About Your Website Traffic: You will be able to gain valuable insights about how people use your website from your Facebook Pixel dashboard.
![]()
How to Create a Facebook Pixel:
Follow these steps to create a Facebook Pixel:
- Log In to Facebook Business Manager
- Navigate to Events Manager (Located by clicking the hamburger icon on the left of the header
- Make sure you select the Ad Account you wish to associate with the Pixel (If you manage multiple Ad Accounts you can select from the drop down menu on the top right of your page).
- Click on the + Connect Data Sources button & Follow the prompts to Create a Pixel.
How to Install Facebook Pixel:
Installing Facebook Pixel on your website is a fairly simple task. If you have access to your website’s code you can be set up in a matter of minutes. Many people need the help of a developer to complete this step. If that’s the case, simply e-mail the code to them and they will be able to help you.
Follow these steps to install Facebook Pixel:
- Log In to Facebook Business Manager
- Navigate to Events Manager (Located by clicking the hamburger icon on the left of the header
- Make sure you select the Ad Account associated with the Pixel (If you manage multiple Ad Accounts you can select from the drop down menu on the top right of your page).
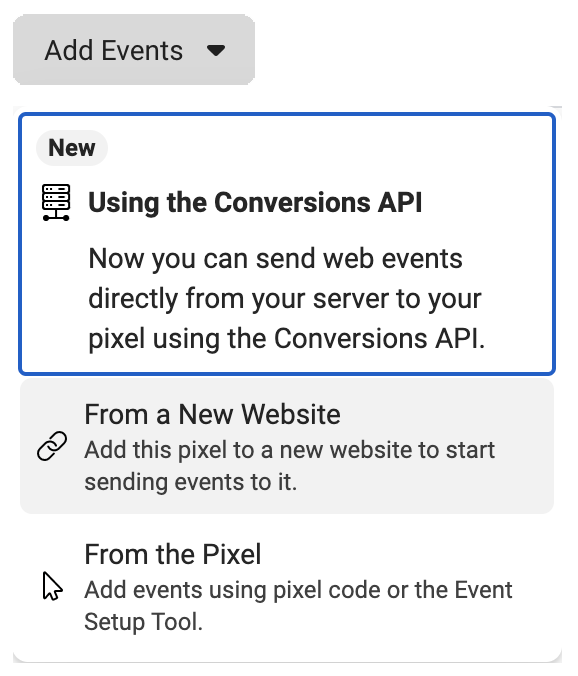
- Select Add Events From a New Website
- If you have access to your website’s code then select Install code manually & follow the guided instructions to insert the code to the header section of your website. Many organizations have partner integrations with Facebook. Select Use a partner if you have login credentials for your website provider.
Detailed instructions on how to install Facebook Pixel in Google Tag Manager, WordPress, and Ticketmaster can be found below.
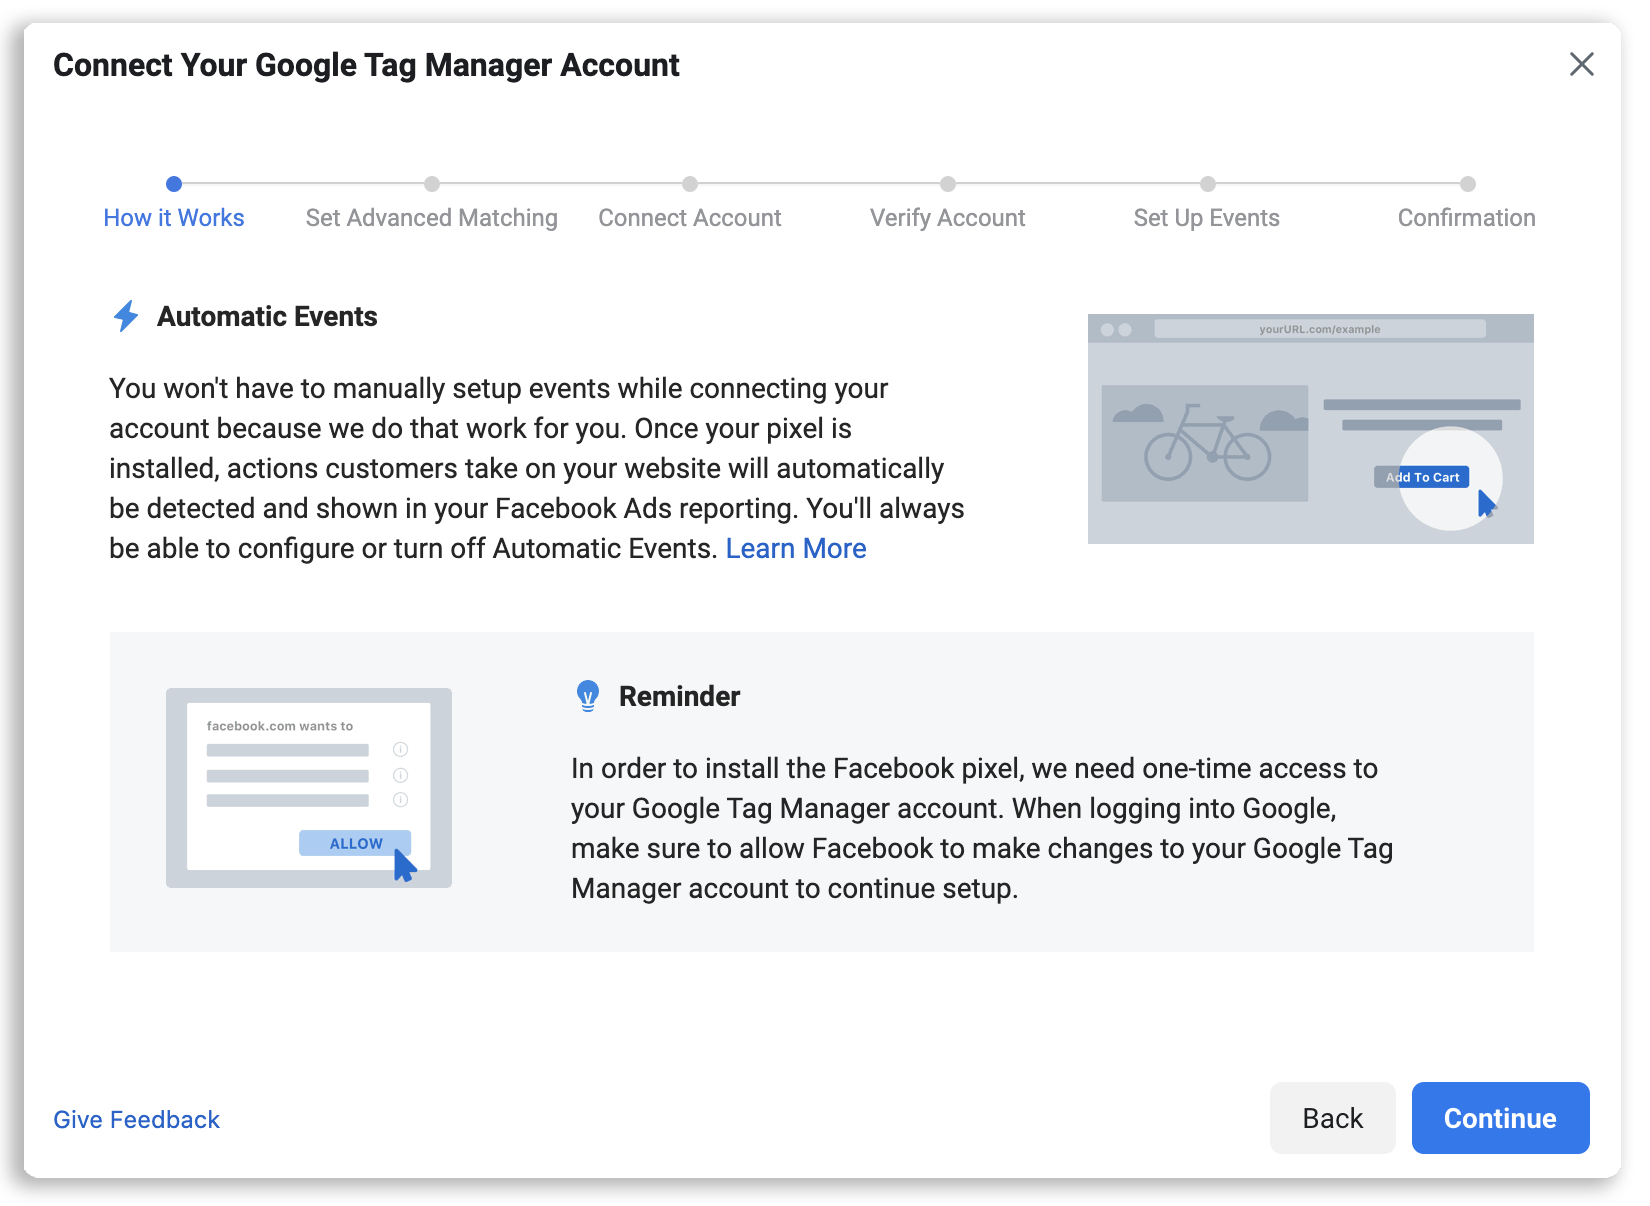
How to Install Facebook Pixel in Google Tag Manager:
In order to install the Facebook Pixel, you will need access to your Google Tag Manager account.
Follow these steps to install Facebook Pixel in Google Tag Manager:
- Log in to Facebook Business Manager
- Navigate to Events Manager (Located by clicking the hamburger icon on the left of the header
- Make sure you select the Ad Account associated with the Pixel (If you manage multiple Ad Accounts you can select from the drop down menu on the top right of your page).
- Select Add Events From a New Website
- Select Use a partner & select Google Tag Manager from the list of partners.
- Follow the prompts to connect Facebook & Google Tag Manager.
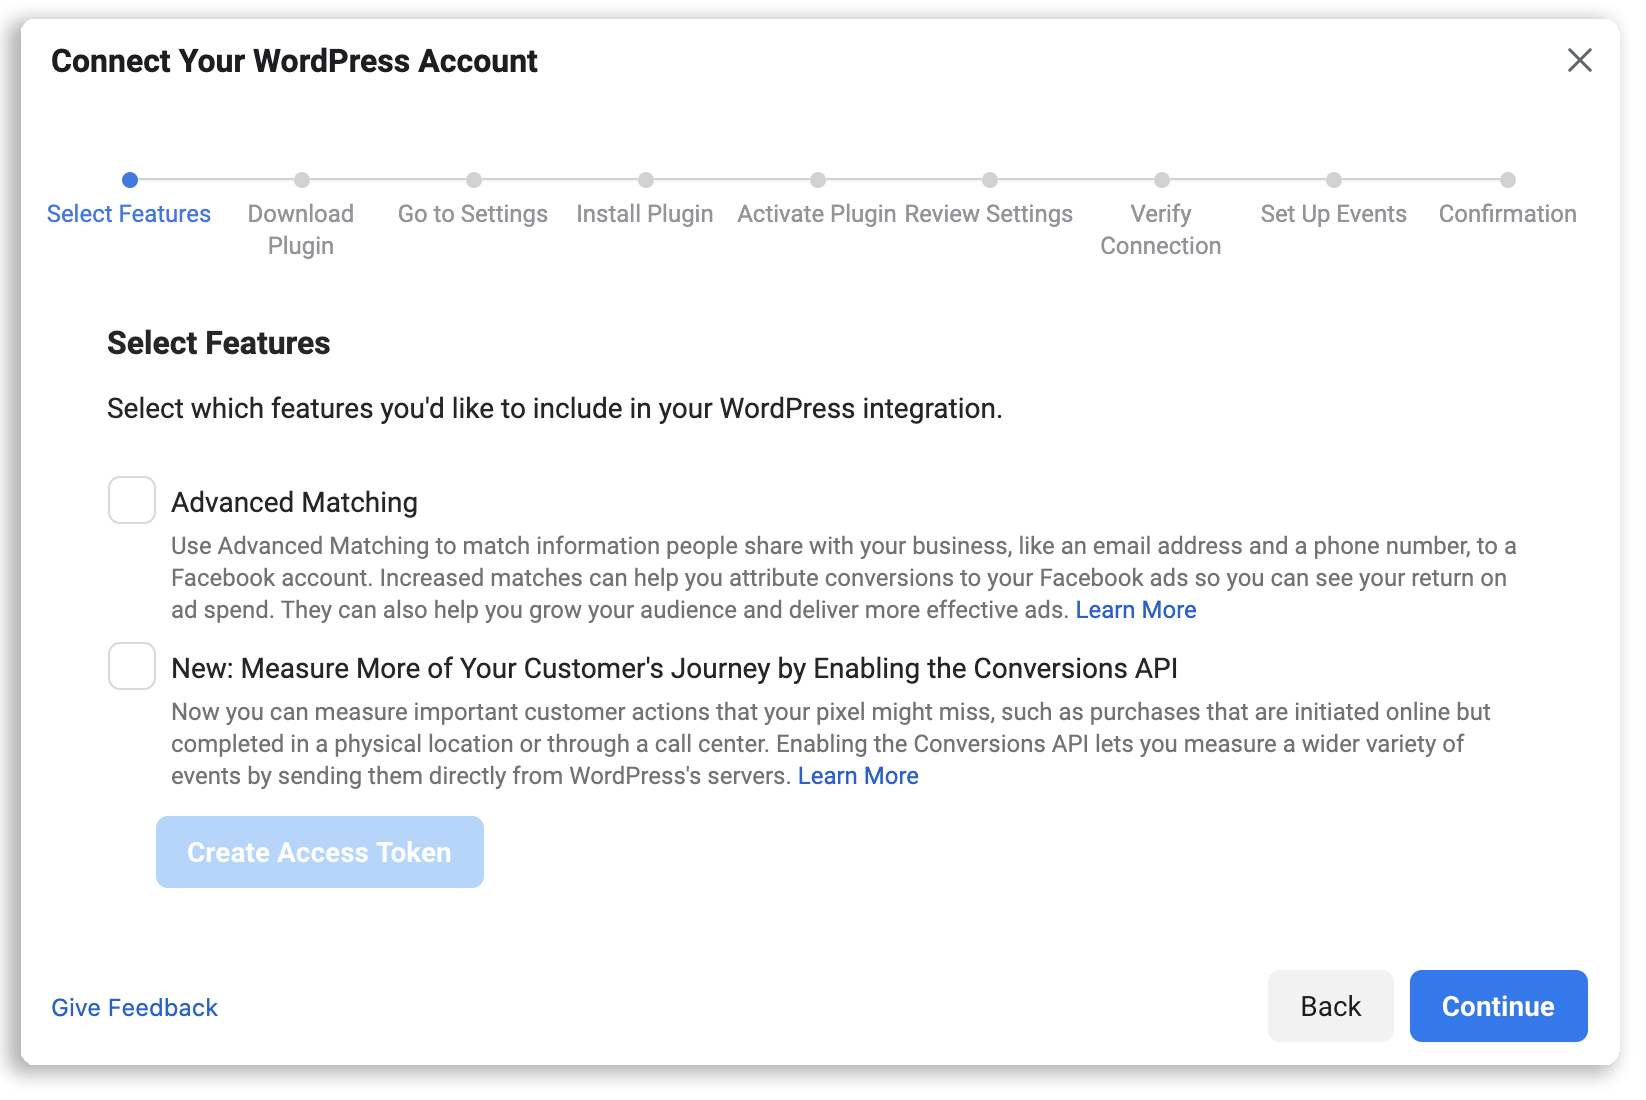
How to Install Facebook Pixel in WordPress:
Facebook has created a Facebook Pixel Extension plugin for WordPress websites. If you have access to the admin panel of your WordPress site this process will be very simple.
Follow these steps to install Facebook Pixel in WordPress:
- Log in to Facebook Business Manager
- Navigate to Events Manager (Located by clicking the hamburger icon on the left of the header
- Make sure you select the Ad Account associated with the Pixel (If you manage multiple Ad Accounts you can select from the drop down menu on the top right of your page).
- Select Add Events From a New Website
- Select Use a partner & select WordPress from the list of partners.
- Follow the prompts to download the Plugin & Install in WordPress.
- Once installed, navigate back to Facebook Business Manager to activate your plugin.
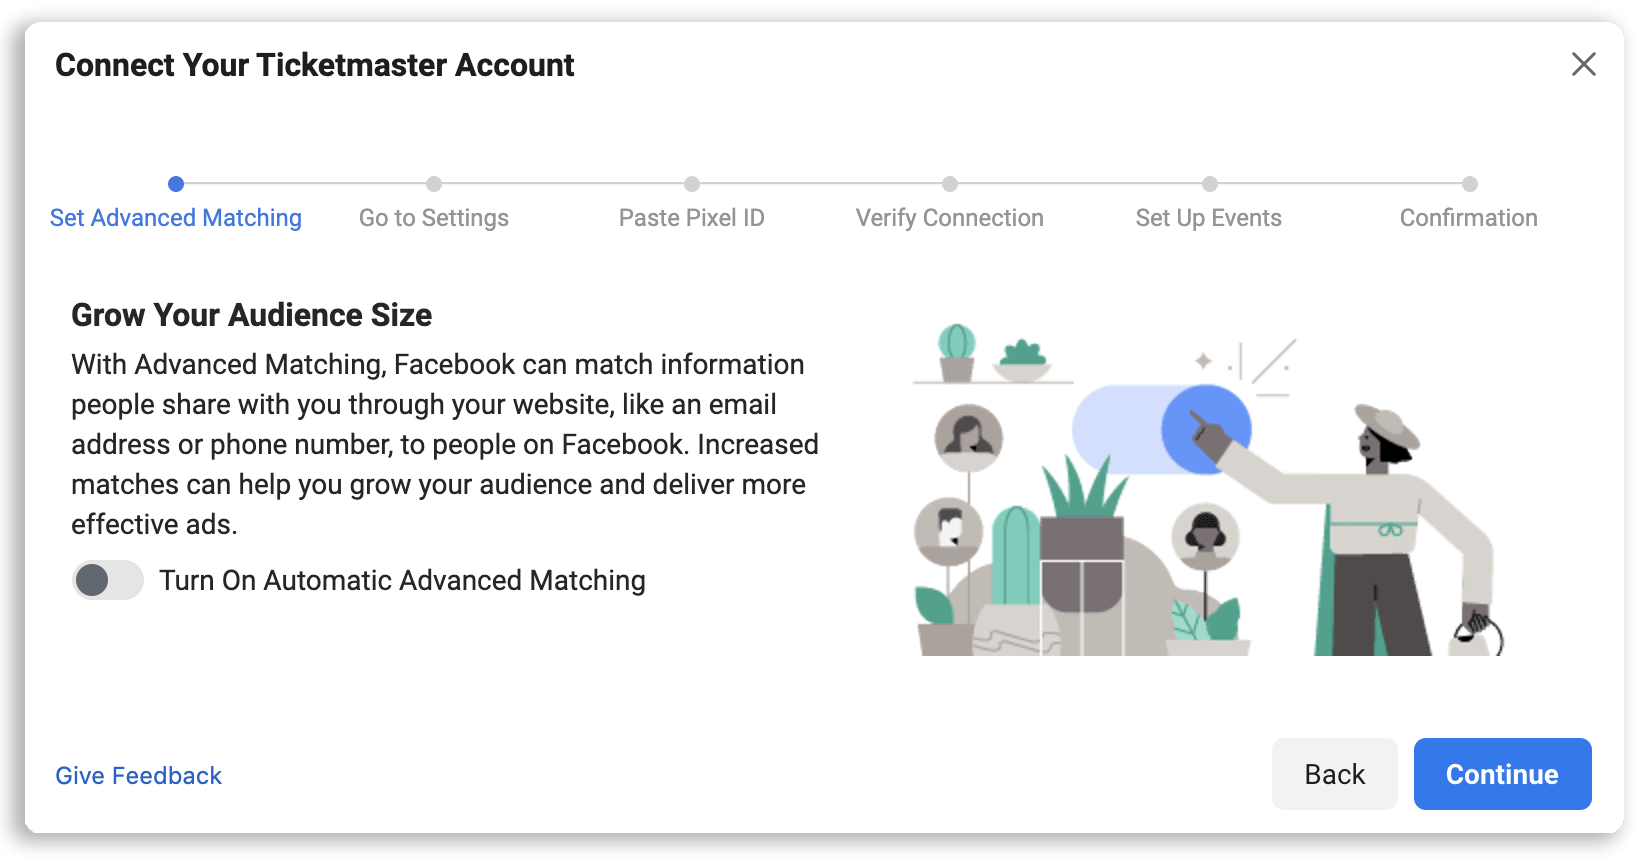
How to Install Facebook Pixel on TicketMaster:
In order to install Facebook Pixel on Ticketmaster you will need access to the Marketing Tab in tm1. Follow these steps to install Facebook Pixel in WordPress:
- Log on to tm1 & Navigate to the Marketing Tab.
- Select Add Pixel Tracking
- Set the Page Types you want to install the pixel on.
- Set the Date Range you want the pixel to remain active. You don’t have to select an end date.
- Select Facebook as the Pixel Vendor
- Enter the Pixel Id
How to Find Your Facebook Pixel ID:
- Log in to Facebook Business Manager
- Navigate to Events Manager (Located by clicking the hamburger icon on the left of the header
- Make sure you select the Ad Account associated with the Pixel (If you manage multiple Ad Accounts you can select from the drop down menu on the top right of your page).
- Your Pixel ID will be displayed on this tab.